Low carb cheese taco shells have been around for years … yet I have never tried them until now!
Yes it’s true! … I was 60 years old when I first tried cheese taco shells and I love them!
Why they are awesome!
- Full of flavor! If you haven’t tasted ‘browned’ cheddar, you are in for a treat.
- Very Low Carb … but with healthy fats and protein.
- Crunchy or softer. These cheese taco shells can be ‘browned’ more, to make them crunchy … or browned less to make a more flexible taco.
Before you ‘dig in’ to this post, for new readers, I am a formerly obese, formerly drug and insulin dependent diabetic. I’ve successfully self-treated diabetes for OVER 13 years!!! … with a TRULY low carb diabetes diet… and I thrive!
Now… on to the recipe for this incredibly nutritious and delicious food.
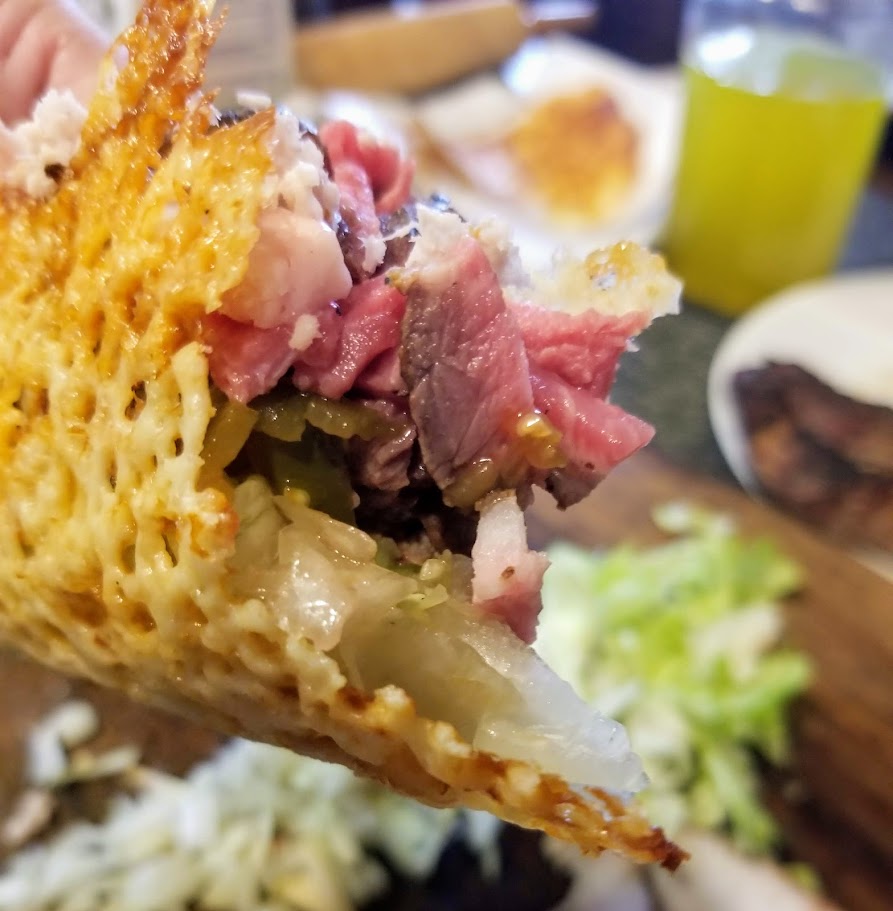
Cheese Taco Shell Ingredients
- Cheddar Cheese: (grated or shredded) 1/2 ounce to an ounce of cheese per taco shell. A baking sheet easily holds 4 shells, so that would be about 2 ounces of cheese.
That’s it… that’s all the ingredients required for the shell. Just add your favorite toppings!
Steve Note: You may want to screen capture this ingredient list … you know, so you don’t forget. 😀
Option Shell Ingredients: Experiment with your favorite cheeses, we experimented with using half cheddar, half mozzarella with a little parmesan to keep the cheese from clumping… and loved it!
The amount of cheese will depend on the number of tacos shells, as well as the thickness and the overall size of the shell. We use 1/2 to 1 ounce of cheese per shell. We tend to like ours ‘light’ so ours are closer to 1/2 ounce.
I suggest starting off with approximately 1/4 cup (about an ounce) of grated cheddar per taco shell. Sprinkle in an approximate 5 inch by 6 inch semi-round circle per shell. Even out the cheese over the surface area.
Utensils Required
- Baking sheet
- Parchment Paper or silicone mat (we used parchment paper)
- Rolling pin, wine bottle or wooden spoon for forming the shells while they cool
- Paper towels for ‘stacking’ the shells for cooling.
Note: Any non-stick surface will work, but I don’t like using teflon or related surfaces.
Cheese Taco Shell Cooking Steps
1 – Grate or shred cheese in a food processor. I prefer doing this at home versus buying grated cheese. Companies use additives to prevent clumping, and I prefer to not eat these.
2 – Sprinkle cheese in a roughly 5 x 6 inch oblong circle, or rounded rectangle … if you prefer. :)
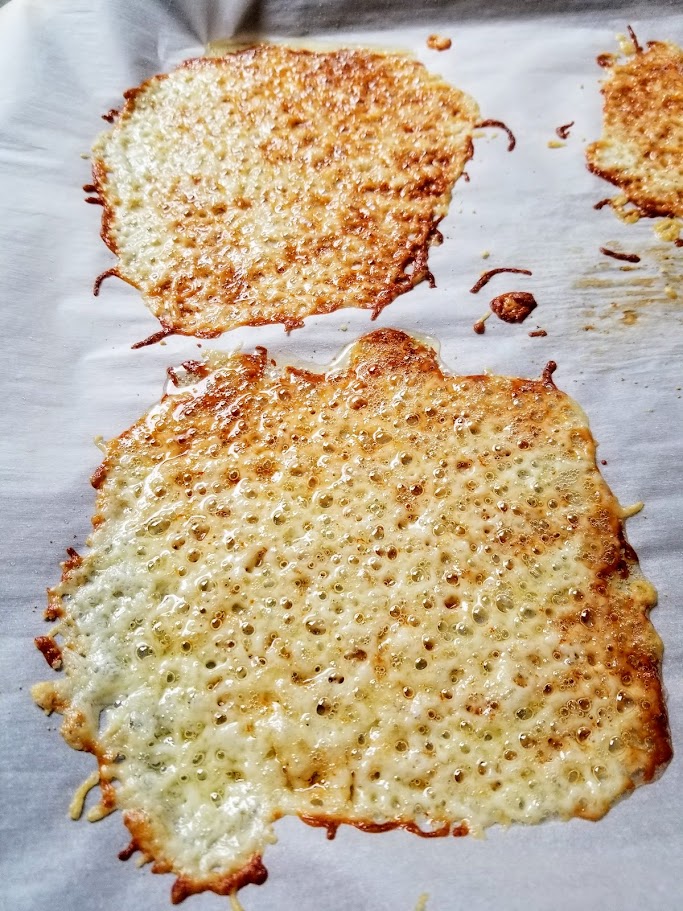
3 – Bake and brown cheese to desired doneness. A good place to start is preheat oven to 400F and bake for 4-6 minutes, keep an eye on them until you get a feel for your oven.
Note: The darker the color, the more rigid the shell. The shells below are perfect for us. They were flexible enough to bend like a taco shell, but stiff enough to hold all the ‘fixings’.
Cooling the Shells
First time we made these, we used a rolling pin to assist in the cooling. We alternated laying taco shells and paper towels on the rolling pins. This absorbs moisture and fat while allowing the shells to cool in a ‘taco-like’ shape. We supported both ends of the rolling pin on top of jars that kept the rolling pin (and taco shells) elevated enough to not touch the counter. This keeps the shells from bending and breaking.
This worked perfectly.
However the next time, we allowed the cheese taco shells to cool on the parchment paper and then gently bent them into taco shape… and this too worked out perfectly. Just pat with a paper towel to absorb some of the cheese fat.
I’d suggest using the rolling pin (wine bottle or wooden spoon) method … but if in a rush or you don’t have one handy, just let them cool on the parchment paper.
These cheese taco shells are good enough to eat ‘as is’, you could allow to cool on parchment paper, then cut into ‘crackers’. Soon we’ll make one large shell that we will use as a pizza crust… can’t wait!
Cheese Taco Toppings
Use your favorite taco toppings!
I would strongly recommend using foods that won’t spike your blood sugars.
Here’s what we used for Round One:
- Fire-grilled steak… so damn good.
- Fire-grilled pork loin (we like grilling meats by campfire). <3
- Lettuce, onions, jalapenos
- Not Pictured: Homemade garlic aioli, sour cream, and Frank’s Hot Sauce.
Note: We sliced one cherry tomato per taco. That’s well within my ‘carb’ allowance (30 grams) for the day.
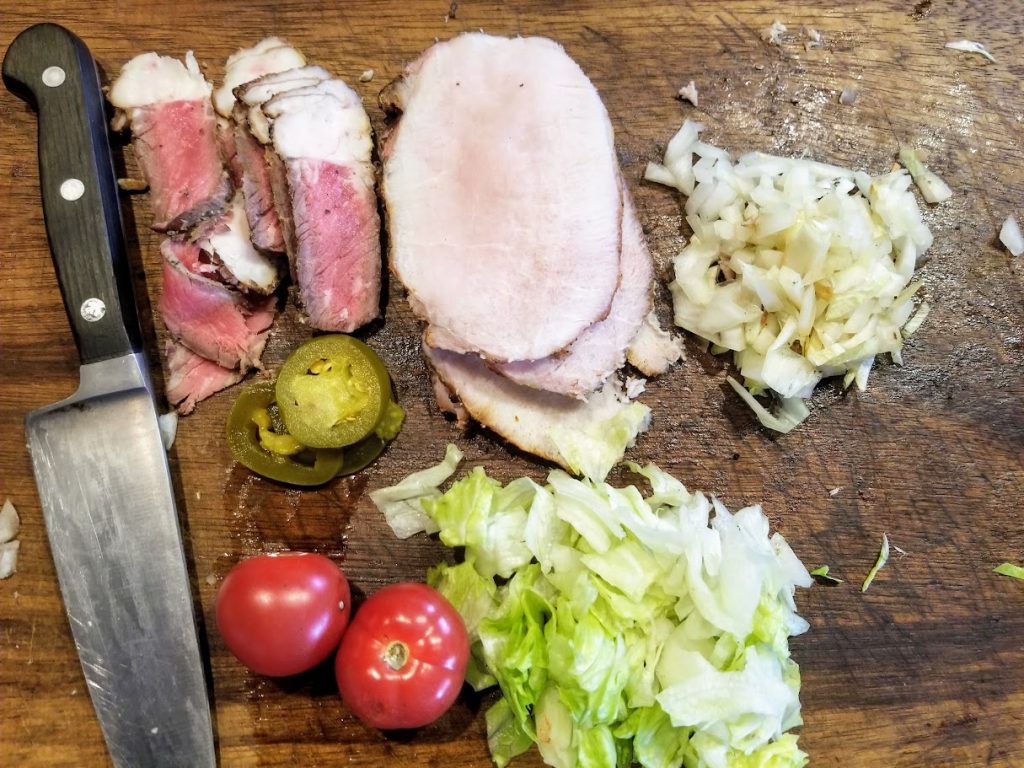
I’d recommend low carb chili or taco meat… but any meat will do as a base, and then there are the toppings. We used one cherry tomato sliced for each taco, lettuce, more cheese, onions, sour cream, garlic aioli and jalapenos.
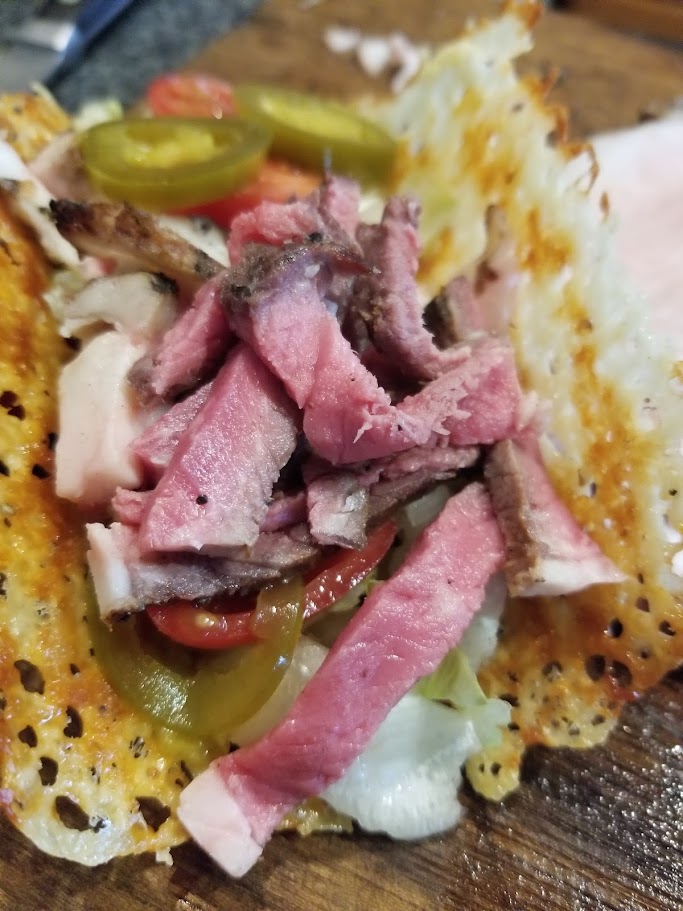
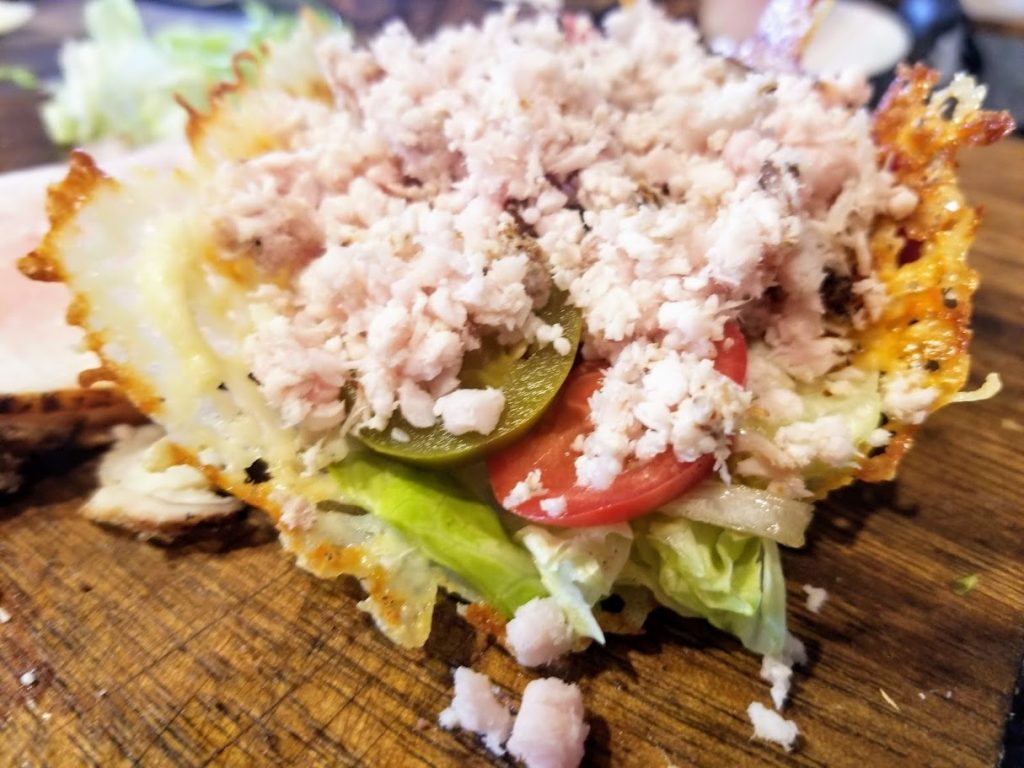
Last Picture
We ground up pork tenderloin in the food processor and added the meat to our standard taco. As you can see the taco is holding it’s shape despite a heavy load of toppings!
When picked up to eat, the shell will hold it’s shape well, but will allow you to fold it up so you can eat it like an actual taco!
We had two of these for lunch and we were full … it’s now dinner time and I’m still not hungry. Don’t get me wrong, I could go for another round of these cheese tacos … 🌮 ❤
These are so delicious and nutritious but best of all… they are TRULY diabetes friendly!
Bottom Line
There are so many low carb, diabetic friendly alternatives to foods… there really is no reason to EVER cheat.
So much pain and suffering could be avoided by simply searching, “low carb alternative _____”, just fill in the blank with your favorite high carb food.
Here’s another link to my diabetes diet, it’s a “Meal Plan You Can Live With” … in fact I’ve been living and thriving with it since 2009.
The best gift you can give yourself … is truly normal blood sugars. I don’t care what your doctor, nutritionist or diabetes educator says.
Hoping you obtain and maintain truly normal blood sugars! ❤
Lower Your Blood Sugar Naturally
If your blood sugars are elevated and you cannot achieve truly normal blood sugars with diet alone…
BUY MY BOOK! How to Reduce Blood Sugars.
