Homemade Pork Skins are diabetic friendly. What’s not to love?
- High in natural , ‘real’ fats
- Moderate protein source and zero carbohydrates
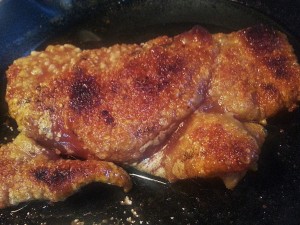
Here’s my finished product, so good!! Crispy, crunchy and you can add your favorite spices as well. Yummo! :)

Of course homemade pork skins are better for you. However, I posted years ago about the advantages of ‘store bought’ pork rinds, “Are Pork Rinds Low Carb Paleo?” . They make a great emergency food source, but I only recommend purchasing those with two ingredients, pork and salt (or sodium). This usually means avoiding the flavored pork rinds.
Pork Skins are Diabetes Friendly
You can check with your local butcher or meat shop to see if they can provide you with pork skins but I have been unsuccessful in finding a source for ‘just’ the pork skin. My pork skin comes from paring or trimming purchased pork shoulders or boston butts and this post will show you how I do it.
For the record… homemade pork rinds are definitely low carb paleo! :)
Note: As usual, click to enlarge any picture.
Step 1 – Purchase Skin Attached
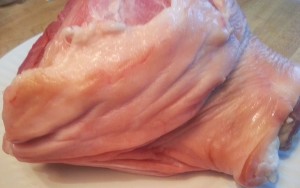
Purchase a shoulder or butt with ‘skin on’ … like this one.
Step 2 – Removing the Pork Skin
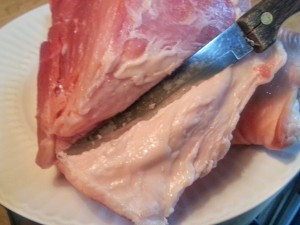
Using a sharp knife, cut the skin in a straight line the length of the bone and begin cutting along the skin line.
Keep the angle of the blade from pointing toward the skin … you may cut clean through the skin.
Keep the angle of the blade from pointing toward the muscle, you don’t want a lot of meat left on the skin.
Note: Neither issue is a major problem. It will not affect the taste… at all. :)
Step 3 – Cooking Prep
Once you remove the skin from the pork roast you can cook the skin several ways… all are delicious.
- I prefer to broil mine in a a broiler pan or black cast iron skillet. This way I can render the fat for later use. :)
- Note that I do have meat on the skin, it’s not a problem.
- Some prefer to cut up the skin in approximately 1 inch square pieces. You can do this by cutting into 1 inch wide lengths and then cutting the lengths again into 1 inch by 1 inch pieces. I’m too lazy and impatient. I prefer to cook it ‘as is’ and bite off or cut chunks off after it’s fried crispy.
- You can season at this time prior to cooking with your favorite spices or wait until the end.
Step 4 – Cooking Part 1
I am going to post a video at the end of this post on another way of cooking pork rinds. But for me as noted above I like to broil in the oven.
Place the skin in a skillet/broiler pan and place on the very top rack. I like to start with the outside of the skin ‘down’ to prevent sticking.
Turn the oven on ‘low broil’ and check it every few minutes until you get a feel for the temperature. For my oven, I check about every 5 minutes or so. Typically every 15 minutes I will remove from the top rack and place on the middle or bottom rack.
After another 10-15 minutes I will move back up to the top rack.
Note: The aim is to brown the skin … not burn it.
Step 5 – Cooking Part 2
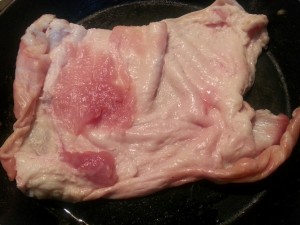
Below is a picture of the underside of pork skin that was browned perfectly in my opinion.
The skin can now be flipped over with the outer skin facing up.
Step 6 – Finished Product
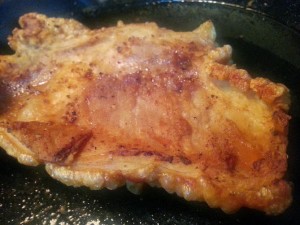
Here is the finished product. I will ‘test’ the skin to make sure it’s very firm. I like mine very crispy and hard.
It makes for easier cutting.
The cooking process takes about 45 minutes to an hour. If I am in a hurry or hungry I will cook it a little faster. :)
Once you have the desired crispiness, remove from the oven. I immediately add my favorite spices including salt, pepper, Slap Ya Mama and Bragg’s Organic Apple Cider Vinegar.
My Favorite Pork Skin Spices


Pork Skins are Diabetes Friendly
If you have never made your own pork rinds… why not? I think you will really like them. I know I do. :) And remember, pork skins are diabetes friendly!
And remember, a benefit of cooking them the way I do is the rendered pork fat. Pour it off into a glass jar and place in the refrigerator for later use in cooking. <3
